Puna clavarioides, Dead man's fingers, Mushroom Opuntia, Maihueniopsis clavarioides, Opuntia clavarioides, Opuntia ruiz-lealii,

How To Care For Opuntia Puna clavarioides -The Dead man’s fingers Cactus

Hi Guys 😀 

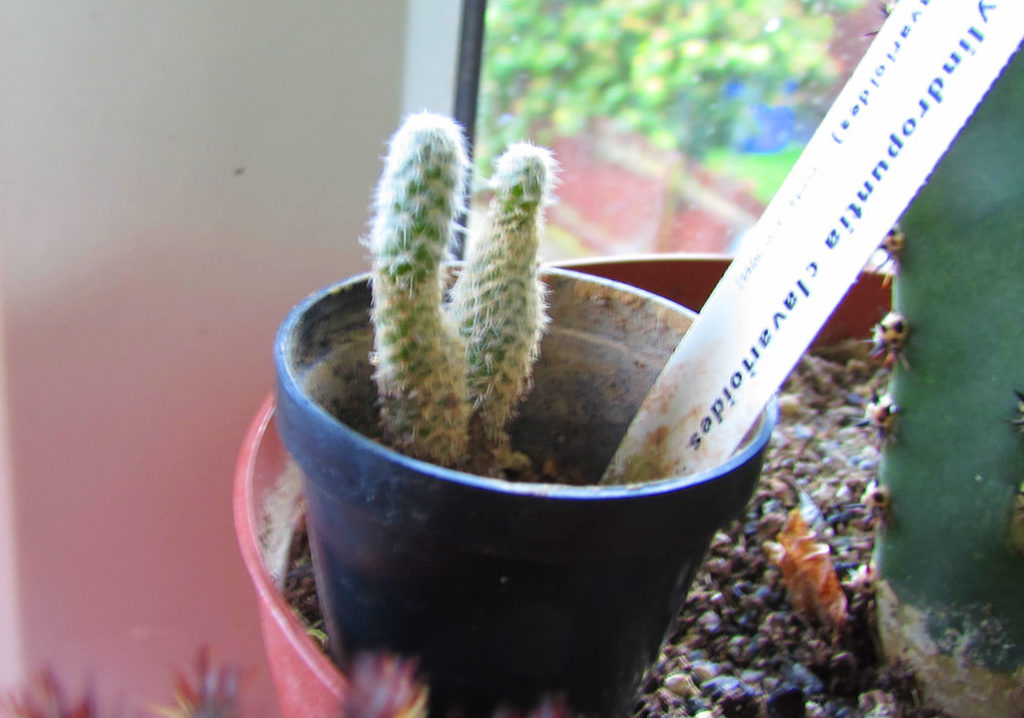
In this Blog I will be talking about a rather unusual and very unique little Cactus called Puna clavarioides also called The Dead man’s fingers Cactus, Mushroom Opuntia, Maihueniopsis clavarioides, Opuntia clavarioides, Opuntia ruiz-lealii, Opuntia Puna clavarioides.

I have filmed a How To Care For video on this Cactus on my You Tube Channel called Desert Plants of Avalon and you can watch this care video HERE

Puna clavarioides, Dead man's fingers, Mushroom Opuntia, Maihueniopsis clavarioides, Opuntia clavarioides, Opuntia ruiz-lealii,
My Puna clavarioides aka Maihueniopsis clavarioides.

ABOUT :

This weird and wacky Cactus is the type species of the genus Puna  also known as the genus Maihueniopsis. 

The Puna genus of cacti are some of the most diverse cacti of the opuntiads and are closely connected to Opuntia, Tephrocactus and Austrocylindropuntia.

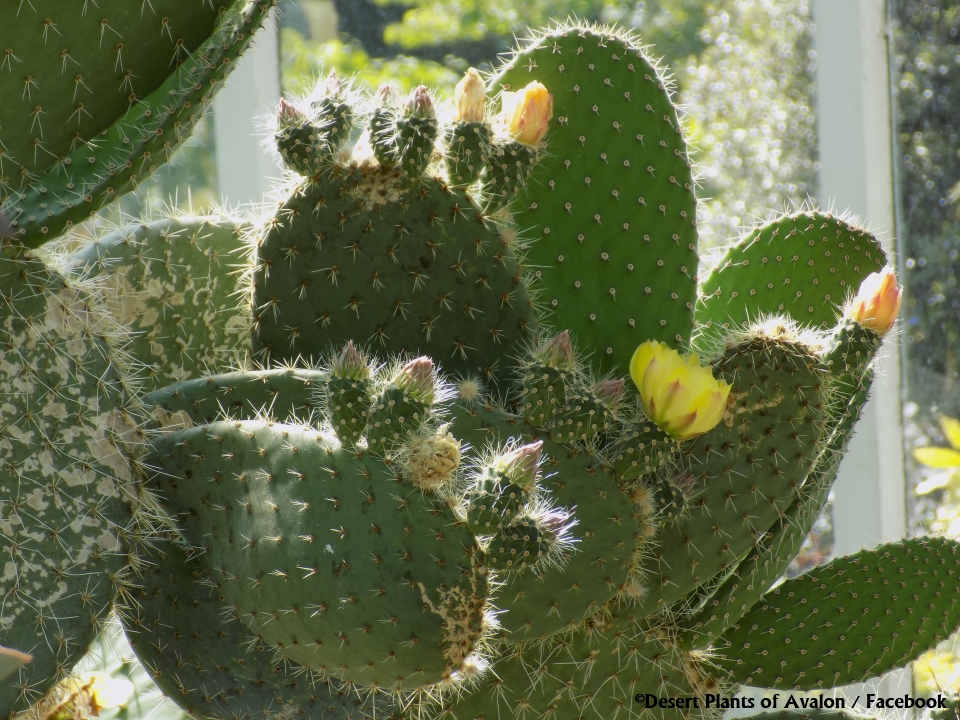
These Cacti are all part of the very large group of the Opuntioideae Family of Cacti. The Opuntioideae  Family of Cacti are commonly known as ‘The Prickly Pear’ 

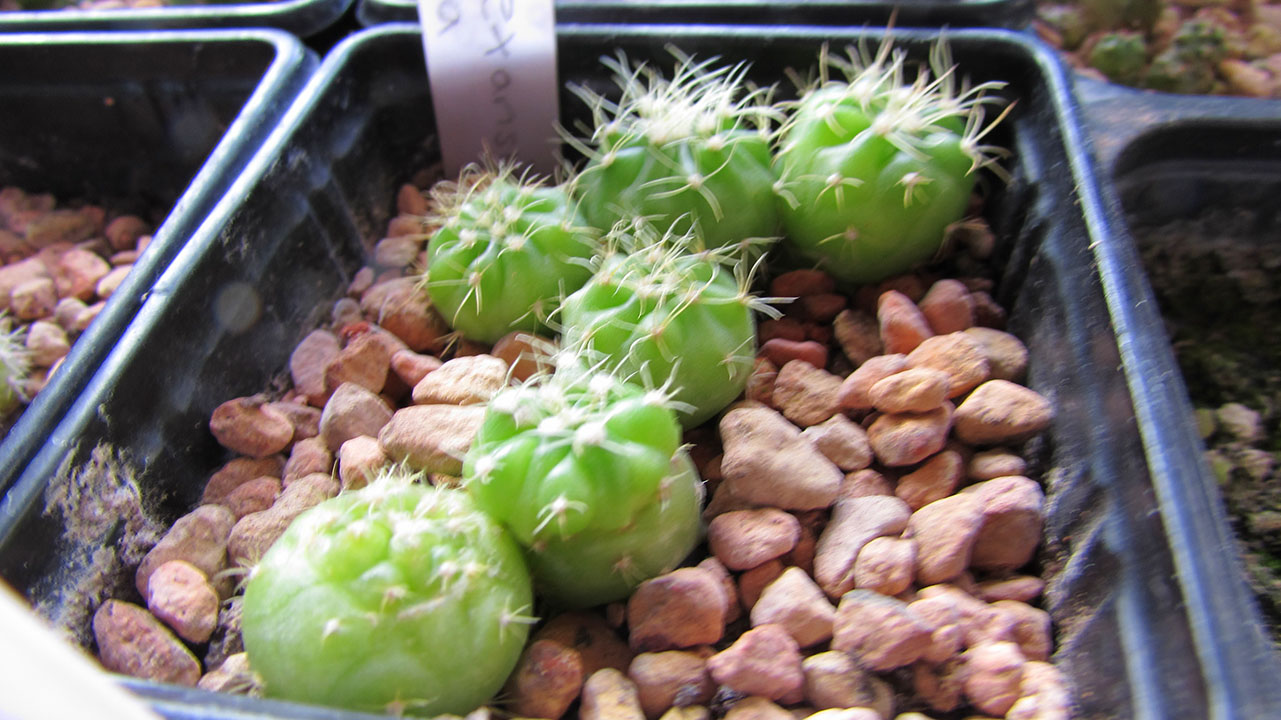
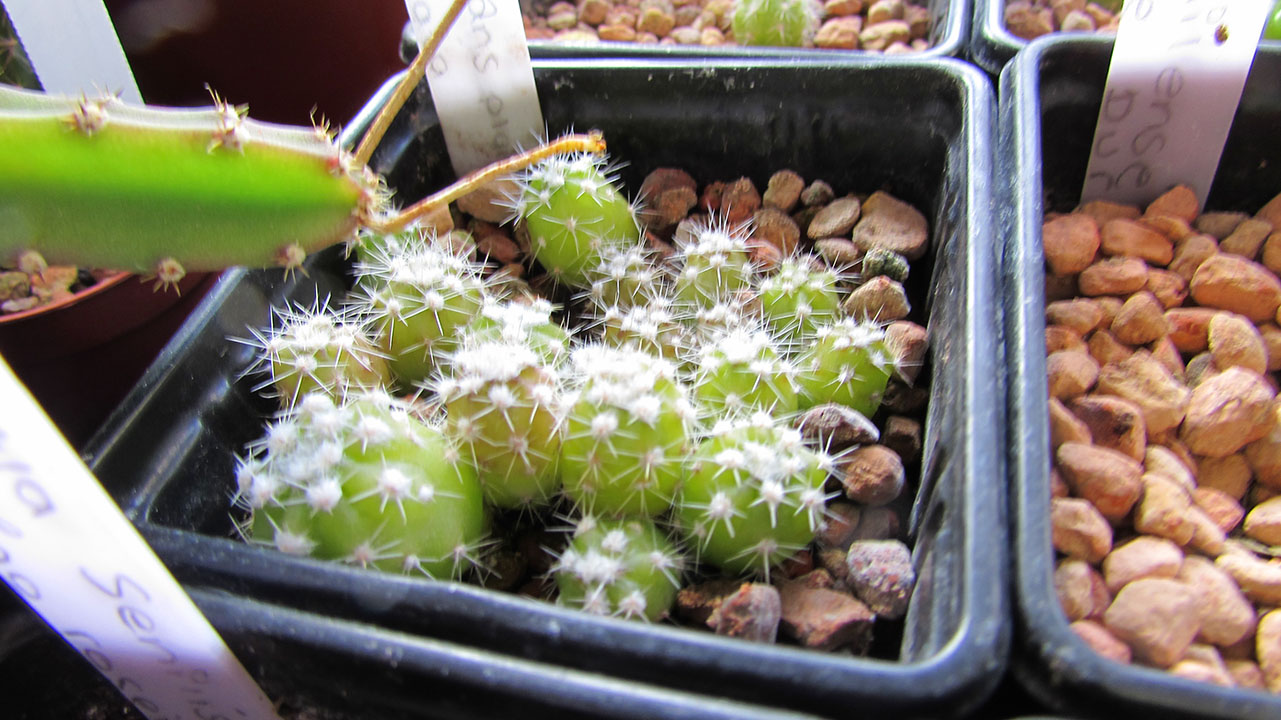
Puna clavariodes is a low growing geophyte cactus that grows in clusters up to 15 cms tall, with conical shaped stems of reddish brown to dark green to grey colour that emerge from tuberous roots.

In natural habitat this Cactus is found in Argentina growing in high altitude on rocks and sand between 2,000 -3,000 metres above sea level in a very dry arid environment.

The Puna clavariodes Cactus although part of the Opuntioideae Family of Cacti does not have glochids that are more commonly associated with the Opuntioideae.

The flowers on this cactus are a yellow /green colour and about 4 cms in length.

This Cactus is rare in cultivation and therefore not commonly seen for sale and when it is for sale it is more commonly sold as a cristate form that is often grafted onto a grafting stock cactus such as Trichocereus spachianus.

CARE & CULTIVATION:

LIGHT:

Puna clavariodes  likes a bright and sunny position all through the year, but can tolerate some light shade too but these Cacti grow better in full sun as long as they are protected from very strong heat.

A bright sunny greenhouse or a south facing window is ideal if protected from heat and sun scorch from glass on very hot Summer days.

WATERING:

Water well in Spring and Summer but ALWAYS allow the soil in the pot to fully dry out before watering again as these Cacti are very prone to rot if kept too wet due to their tuberous root systems.

Clean rainwater is always preferred if it is available, but tap water is ok as long as the Ph of your water is not too high ( above 7,5 pH ) Its always best to let tap water sit for 24 hours before using it to allow some of the chemicals to dissipate. 

Keep this Cactus totally dry over the Winter dormancy period with no water given whatsoever.

SOIL:

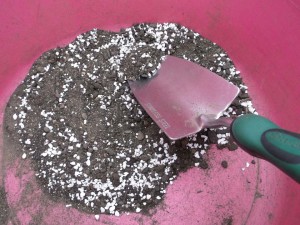
Puna clavariodes likes a very well draining mineral soil as this cactus is very prone to rot due to the tuberous root system and a well draining soil is a must. I like to use a soil mix of 3 equal parts of a Loam based soil with with Horticultural sand and grit. Check out my page on this website on GROWING MEDIUMS for more advice on How to Make Your Own Cactus Soil.

RE POTTING:

Re pot only in Spring and Summer when this cactus is actively growing, this is because it is a slow growing cactus and because of the tuberous root its best to keep this plant in a clay pot that is deep enough just to cover the tuberous root, it is always safer to under rather than over pot.

Do not water this cactus for the first 2 weeks after re potting to allow the roots and tuber to acclimatise. 

FERTILISING:

Feed Puna clavariodes in Spring and Summer every month with a Cactus fertiliser diluted at half strength, this is because this cactus is a slow growing plant and does not require lots of fertilising.

FLOWERING:

Puna clavariodes flowers in Spring and Summer with yellow blooms. A dry winter rest period will help to encourage blooming the following year.

TEMPERATURE:

Puna clavariodes likes to be kept above 5 Celsius / 41 Fahrenheit in the Winter months, but can take lower temperatures than this if growing this cactus in a very dry arid climate.

Protect this Cactus from very high Summer temperatures above 32 Celsius / 90 Fahrenheit.

Here is a video that I have made for my You Tube Channel called Desert Plants Of Avalon on How To Care For Puna clavariodes and you can watch that video below:

Thank you so much for reading and HAPPY GROWING GUYS 😀 


Top 5 Cactus Plants to Grow for Beginners

Hi Guys 😀 

In this Blog I am going to be talking about the Top 5 Cactus Plants that are great for beginners.

There are many amazing cactus plants that are available to buy and grow but if you are new to the hobby and passion of growing these incredible plants it can be a bit difficult to know what types of Cacti to begin with as some are much easier to grow and get to flower than others.

I have a lot of favourite Cacti that I can recommend that are easy growing for newbies to the hobby, but not all of them are easily available to purchase in the garden shops or online and if I was to pick just 5 of the easiest Cacti to find and to grow these are the Top 5 that I recommend. 

1, REBUTIA

This Cactus Genus is often overlooked and yet it is one of the most beautiful and easy growing of cacti to grow especially for beginners. Rebutia are often nice and compact small clump forming growing plants that are ideal for windowsills and apartments, they are low maintenance and as long as you give them a cool and dry winter rest period they will often flower abundantly from spring and Summer with a multiple of beautiful small blooms. 

Rebutia like a sunny position in Spring and Summer and like to be grown in a well draining Cactus soil with a monthly fertilising once a month from Spring until late Summer.

Here is a video below I have made for my You Tube Channel called Desert Plants Of Avalon of my Rebutia albipilosa Cactus with a beautiful abundance of bright orange blooms: 

Here is a video below I have made for my You Tube Channel called Desert Plants Of Avalon of my Rebutia Perplexa with a bright pink bouquet of flowers: 

2, MAMMILLARIA


Mammillaria Cacti are fantastic plants for beginners and they are very commonly seen for sale in Garden centres and online cactus nurseries.

Mammillaria are very easy flowering as long as you give them plenty of sunshine and they love a cool Winter dry rest period. Some Mammillarias can grow large over time and some can stay small and compact too depending on the variety of Mammillaria.

 Here is a video below I have made for my You Tube Channel called Desert Plants Of Avalon of my Mammillaria carmenae Cactus Plant with a Garland of white flowers :

3, ECHINOPSIS


Echinopsis Cacti are often known as ‘The Sea Urchin Cacti’ or ‘The Domino Cacti’ due to many of the globular type of Echinopsis resembling a sea urchin in their appearance. Echinopsis cacti are also very readily available for purchase in many Garden centres and online nurseries and can be found in many forms and in a huge variety of differnt flowering colours, they are very highly hybridised and because of this almost any colour of flower can be seen with this Genus from white to yellow to red and pink and orange.

Echinopsis is also an easy one to get to flower and as long as you can give them a cool and dry winter rest they will flower often multiple times from spring and Summer often with highly scented blooms.

Here is a video below I have made for my You Tube Channel called Desert Plants Of Avalon of my Echinopsis subdenudata Cactus with a fountain of beautiful blooms:

4, GYMNOCALYCIUM

Gymnocalycium Cacti are wonderful globular Cacti that are also very easy flowering plants. Most Gymnocalyciums prefer a bit more shade than others but they will often let you know if they need less sun by taking on a slight yellow appearance but most commonly available for sale Gymnocalycium can take plenty of sunshine if protected from very intense full sun desert conditions.

Gymnocalyciums like most of the Cacti like a cool and dry winter rest period and can take plenty of after during their active growing and flowering season from spring and summer as long as the soil is a well draining cactus mix and the soil is allowed to dry out in between waterings as these Cacti have a tendency to lose their roots if kept too wet for too long but as long as these conditions are met then they are very easy cacti to grow and flower.

Here is a video below I have made for my You Tube Channel called Desert Plants Of Avalon of my Gymnocalycium pflanzii cactus in beautiful bloom. :

5, OPUNTIA


Opuntia Cacti commonly known as ‘The Prickly Pear’ are very often seen for sale in Garden Shops and Florist Shops the Opuntia microdasys being the most common one.

Opuntia Cacti are like the ‘Marmite’ of the cactus world haha you either LOVE them or HATE them.

Personally I LOVE them, they have such character and have a wonderful almost comical look about them.

The Opuntia Genus is MASSIVE as there are so many different types of Opuntias some are small and compact and some are HUGE, also the Tephrocactus, Cylindropunta also fit under the whole Opuntia group of Cacti and this Genus is so varied that some Cactus collectors specialise in this whole genus by itself.

Although Opuntias them selves are easy to grow and many can take very low Winter temperatures making them ideal for greenhouses and even outdoor gardens in Summer and can even be grown outdoors in Northern Hemispheres if given a very sheltered position and protected from rain and frost. Many Opuntias can certainly take more humidity than many of the other cacti can too.

Most of the Opuntias are very fast growing and can grow large though so if you are short on space it may be best to concentrate on the many smaller growing Opuntias that are available such as the Opuntia microdasys ‘minima’ or the Tephrocacti. 

If you are into flowers though Opuntia are not the easiest to get to flower in cultivation so bear that in mind if you are more into flowers, but personally I just LOVE the appearance of Opuntia even if they are hard to get to flower in cultivation.

Given plenty of sunshine and a cool and dry winter rest period they can still flower in cultivation and here is a video below that I have made for my You Tube Channel called Desert Plants Of Avalon of my Opuntia Stricta Cactus with a beautiful bright yellow bloom. :

I hope that you found this Blog on The Top 5 Cactus Plants To Grow For Beginners useful and if you want to watch a video I have made for my You Tube Channel Called Desert Plants Of Avalon on The Top 5 Cactus Plants To Grow For Beginners Here is the Video : 

Thank you all for reading and lets all have a fantastic time growing these AMAZING plants.


How to Grow Cacti & Succulents from Seed

In this Blog I will be talking about how you can grow cacti and Succulent plants from Seed and talking about the method I like to use to grow my cacti and succulent plants from seed and I have had great success throughout the years using this method.

how to grow cacti from seed
Photo: My Homalocephala texensis ‘Horse crippler cactus’ cactus seedlings just over a year old

Although there are many different ways to grow cacti and succulents from seed and there is no right or wrong way, In this Blog I will be showing you how to grow cacti and succulents from seed using the bag method.

I have included videos I have made for my Cacti & Succulent Plant You Tube channel called Desert Plants of Avalon that include step by step instructions on growing Cacti and Succulents from seed as well as a video on how to care for seedlings during their first Winter.

Why grow from Seed ? 

Growing from seed can be very rewarding as you get to see your plants grow from seedlings to mature plants over the years and although it can be very time consuming, knowing that you have grown your cacti and succulents from seed is a real buzz.

When is the best time to grow from seeds ? 

Cacti and Succulent seeds are best sown in late Winter, Spring or early Summer, this is because the days are longer and the temperatures are warmer, but if you have grow lights and additional heating then you can still sow seeds in Autumn and Winter too, the most important thing is that the seeds /seedlings are kept at a minimum temperature of 70 Fahrenheit  /21 Celsius.

cactus seedlings, how to grow cactus from seed
                                                        Photo:  My Rebutia muscala cactus seedlings at 8 months old.

What do I need to grow from Seed ? 

You will need :

Seeds, plant pots, transparent zip lock bags, a pen, plant labels or white sticky labels, 2 parts loam based seed sowing soil ( or any well draining soil ) 1 part grit or perlite and 1 part horticultural sand.

I have found that the clear fruit pots that you commonly see cherry tomatoes or strawberries sold in are perfect sizes to use as small seed pots and they fit perfect in the bags too as well being a great way to us as recycling,  just make sure that you thoroughly clean them first before using them for seed sowing.

How do I grow Cacti and Succulents from Seed ? 

If you want to watch a step by step video on How to Grow cacti and Succulents from seed then check out my video I have made for my You Tube channel called Desert Plants of Avalon below: 

Thoroughly mix up the 2 parts seed sowing soil with the 1 part perlite OR grit with the 1 part Horticultural sand. You can use the amount of soil mix to the amount you need depending on the size of your seed pots.

If the soil you are using has stones or lumps of bark chippings in it etc its best to remove these by running the soil through a gardening sieve first.

thoroughly mix up the seed sowing soil with the perlite or grit and the horticultural sand, you can remove any hard stones or bark chippings etc by running the soil through a gardening sieve first before mixing.

Once you have thoroughly mixed up all the soil with the perlite or grit and sand then its best to sterilise the soil by either microwaving it or heating it in the oven, this is optional but its something I like to do as it helps to reduce fungus and bacterial attacks on the young seedlings after they have germinated.

If you are sterilising the soil in the microwave then put all of the soil mix into the microwave on high setting for 3 minutes stopping half way through to thoroughly sir the soil mix with a clean spoon, its important that the soil mix is extremely hot as this is what will kill any pathogens and to sterilise your soil.

If you are sterilising your soil mix in the oven bake the soil mix at 180-200 F. /82-93 C for at least 30 minutes, or when the temperature of the soil mix reaches 180 F. (82 C. you can test the temperature of the soil by using a cake thermometer. 

Allow the soil mix to cool down before putting into the seed pot/s.

Once the soil mix has cooled down put the soil mix into the seed pots and place the seed pots in a tray or trays filled with 2-3 inches of clean water, if using rainwater it may be best to boil the water first and allow to cool down so any pathogens that could be in the water are reduced.

Leave the pots in the water until the soil mix in the pots is completely soaked with the water, this can take up to an hour or more but its important to be patient so the soil mix is thoroughly moist all the way through the soil.

Write the name /s of the seeds you will be sowing on the Plant labels / white sticky labels that you will be putting on the bags, and also the date you are sowing the seeds.

Make sure your hands are thoroughly clean then sow the seeds evenly across the surface of the plant pot/s. If the seeds are very small its best to sprinkle them on like pepper as evenly apart as possible but with larger seeds such as Opuntia or Aloe seeds you can place them onto the surface individually and gently press them down. 

Once you have sown the seeds you can very lightly sprinkle some horticultural sand on the top of the soil but make sure the sand is moist. By using sand this can help to minimise moss that often likes to grow on the soil that the young seedlings are growing in due to the soil always needing to be kept moist.

Place the seed pots into the clear plastic bags and make sure to release all the air inside the bags first before sealing the bags. 

Place the bags in a bright well lit location that receives some sun but not intense sun or intense heat.

Keep the seedlings inside their clear bag/s for a minimum of 3 months but you can keep them in the bags for longer than this if the seedlings are still small, I have kept seedlings in the bags for up to 10 months if they are still small and the soil inside the bags is still moist.

echinopsis subdenudata seedlings, cactus seedlings, domino cactus seedlings, sea urchin cactus seedlings,
My Echinopsis subdenudata cactus seedlings commonly known as The Sea Urchin Cactus or Domino Cactus. These seedlings are one year old.

After Care: 

NEVER open the bag/s until after a minimum of 3 months this is to continue to keep the seedlings and soil sterile, however if you notice your seedlings have fungus or any other problems sometimes opening the bag/s may be inevitable.

The young seedlings should not dry out in the bags for up to 3 months, this is because the clear bags act like a mini greenhouse and there is no room for the excess water inside to evaporate, and young seedlings do not take up large amounts of water, however if you notice the soil inside of the bag/s looks like it i drying out then you will have to open the bag/s to water before the 3 months.

After 3 months you can gradually unzip the clear bags over a few days to allow the seedlings inside the bag to acclimatise to the drier air outside of their bag/s in their new environment after a few days you can then take them out of their bag/s completely.

If after the 3 months your seedlings are still small then they can still stay in the bag/s for many more weeks or months if the soil inside the bag/s is still moist, sometimes I will leave my seedlings up to 9 months in the bag/s if there is no need for them to come out of them.

cactus seedlings
A selection of my cacti and succulent seedlings all grown by using the bag method.

How do I care for young cacti and succulent seedlings during their first Winter ? 

This can be confusing to many people because we are told as cacti and succulent growers to keep our plants cool and dry over Winter, but what do we do with young seedlings especially during their first winter ? because a cold and especially dry period could kill them off as the are still so young and their roots will still be fine and developing.

I strongly recommend that you overwinter your young cacti and succulent seedlings indoors at a minimum temperature of around 15 C/ 60 F for their first Winter. I would also still continue to water them lightly just enough to stop the delicate root hairs from drying out.

In their natural habitats in Winter young cacti and succulents would be growing under the shade of larger plants and vegetation where they would naturally be receiving more humidity and warmth than their mature parents that are  more exposed to the elements, therefore in nature in their natural habitats in dry arid deserts even in the Winter young seedlings would still be receiving moisture from the humidity on the lower grounds of the vegetation for their young developing root systems. 

After their first year you can continue to treat them as you would more mature cacti and succulents depending on their size and what type of cactus or succulent they are.

Here is a video I have made for my You Tube channel called Desert Plants of Avalon on How to care for Cacti and Succulent plant seedlings during their first Winter and you can watch this video below : 

If you have watched my video on How to Grow Cacti from Seed that I have made for my You Tube channel called Desert Plants of Avalon then check out the video below I have made on the update : 

Good luck with growing from seed Guys and more importantly HAVE FUN 😀